Clash of Clans

Clash of Clans Tactics: Attack Tactics

April Updates

New Trophy Leagues

Clash of Clans

Clash of Clans Tactics: About us

Clash of Clans: May Updates

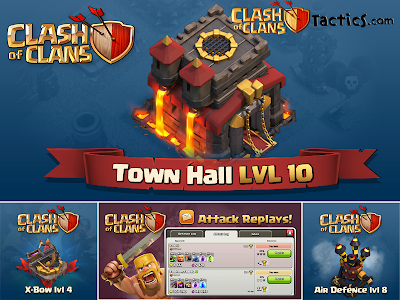
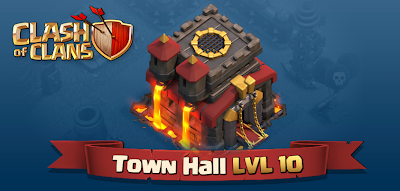
New Town Hall level 10

Clash of Clans

Clash of Clans Tactics: Defense Tactics

Clash of Clans: June Updates

New Freeze Spell

Clash of Clans: Two Years of Clash!

Happy Anniversary, Chief!

Clash of Clans: December Updates

Clash of Clans Tactics: Winter is Here!


X-Bow

What is X-Bow?
I don’t know what X-Bow is, I know only Fire Hose of Death…….
Seriously, continuous shot of pink Elixir out of the X-Bow resemble the water coming out of the fire hose, combined with rapid damage output results in death all over the battlefield.

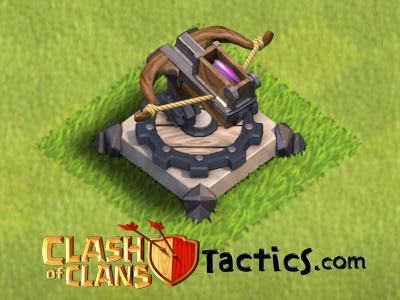
X-Bow is the very strong defense building coming with Town Hall 9 at 27 October 2012 updates. It is the only building in the game that can adjust the range and Ground & Air targets.
Clash of Clans Tactics
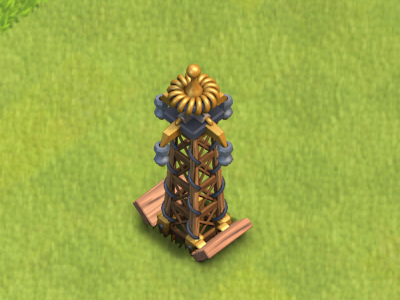
The X-Bow shoots mystical bolts with terrifying power. Load it with Elixir and the X-Bow works automatically. You can set it to target ground units at long ranges, or all targets at reduced range.
Here’s a preview video showing off X-Bow;

The Grand reveal of X-Bow! See this weapon in action as it mows down a group of Archers in Ground Defense mode. Choose it to target only ground units at extended range, or set the X-Bow to target both air and ground units at shorter range. The X-Bow uses Elixir for ammunition, and needs to be reloaded occasionally.

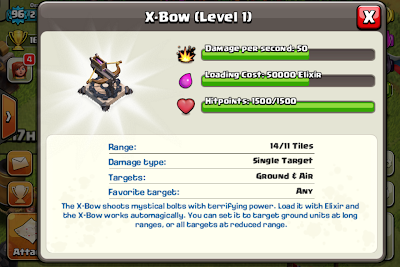
X-Bow Fact (at level 1)
Damage per second = 50
Loading cost = 50,000 Elixir
Hit points = 1,500
Range = 11 tiles // Targets = Ground and Air
Range = 14 tiles // Targets = Ground
Damage type = Single Target
Favorite Target = Any
Clash of Clans Tactics

Clash of Clans Tactics

X-Bow shoots at extremely fast rate of 0.128 second per shot (≈ 1/8 second), combining with its very long range make X-Bow one of the most intimidating defense buildings to ward off attacker. Due to fast shot rate, X-Bow deals very little damage per shot. This is actually a strong point of X-Bow because the damage is minimally wasted.

X-Bow – to kill – Wall Breaker level 5
X-Bow level 1 deals 6.4 damage per shot, thus takes 7 shots (0.896 second) to kill Wall Breaker level 5.
X-Bow level 2 deals 7.68 damage per shot, thus takes 6 shots (0.768 second) to kill Wall Breaker level 5.
X-Bow level 3 deals 9.6 damage per shot, thus takes 5 shots (0.640 second) to kill Wall Breaker level 5.
X-Bow level 4 deals 10.24 damage per shot, thus takes 5 shots (0.640 second) to kill Wall Breaker level 5.

Unless Wall Breakers are deployed in group, X-Bow can easily kill it before it can explode itself.

Should I set X-Bow to ground only for long range?
Similar to Air Defense tactics, if you stay in low trophy range, setting X-Bow to ground only gives you long range coverage from X-Bow.

Also depending on Air Defense placement, you can set X-Bow to ground only and have some Air Defenses near center of your base. Or set X-Bow to ground & air while place Air Defenses at base perimeter.
Clash of Clans Tactics
Upper left is X-Bow set to Ground, while lower right is X-Bow set to both Ground & Air.
Defense Tactics for X-Bow
1) Base Coverage
Just place your X-Bow behind 2nd layer of wall, one at each opposite side. This is good position to cover your entire base; also they can cover and protect each other.

2) Center focus
Place both X-Bow deep in the middle of your base inside the last layer of Wall, protecting either Town Hall or Storages. This is one of the strongest placements if you can sacrifice the space in the middle.

3) Deceiving // Forcing attacker
Place both X-Bow on one side of the base, making that side look stronger than another. But actually the placement of the side without X-Bow is stronger, for example more splash damage, more trap or more Hidden Tesla. This is to deceive or force attacker to deploy troops from specific side.

This tactics is a bit risky which depends on attacker skill & experience.

Attack Tactics against X-Bow
1) Do everything quick!
Only tactics that can beat X-Bow is the quick action. You cannot slowroll at the presence of X-Bow. Because X-Bow is always shooting at your troops, you can’t wait the time to pass by for any second. Make sure you spend first 30 seconds to analyze the base and plan the whole sequence of troop deployment.

2) Fly over!
If the X-Bow is set to ground only, flying troops are your best bet.

3) Decoy/Distraction & Healers
Deploy Golem, P.E.K.K.A or Barbarian King to be decoy/distraction for X-Bow absorbing all damage and use few Healers to counteract the received damage. Then, deploy your main force to attack the base.

4) If you can’t beat it, just ignore it.
Yes, you don’t read it wrong. Just ignore the X-Bow. X-Bow level 1 is not that strong compared to other defenses. It just has long range and always dealing damage. While it’s easy to swarm the X-Bow, due to its high hit points, Barbarian and Archers are usually dead by splash damage before taking the X-Bow down.

If you aim for Resources, just ignore the X-Bow and focus straight to the Storages.

Air Defense

What is Air Defense?
Air Defense is the only defense building in the game that cannot attack ground units. It is specifically designed to be powerful against air units.

So what, I have never/rarely seen air units attacking my base? 
That might be true if you stay in low trophy range where Dragons army is not prevalent. However, at high trophy range, players are frequently using their Dragons to its extreme. Placing Air Defense outside your base basically ask for Dragons to easily annihilate your entire base.

But I really stay in low trophy range…?
It’s true that Balloon tactics is quite obsolete for many months. But don’t underestimate the possibilities of Healer in action. Putting one or two Air Defense near the middle of your base is worth it, and can prevent Healer to be safely deployed early in the battle.
Clash of Clan Tactics
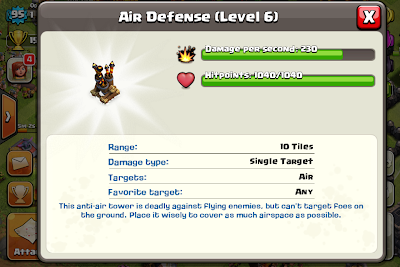
This anti-air tower is deadly against flying enemies, but can’t target foes on the ground. Place it wisely to cover as much airspace as possible.
Air Defense Fact (at level 1)
Damage per second = 80
Hit points = 800
Range = 10 tiles
Damage type = Single Target
Targets = Air
Favorite Target = Any
Clash of Clans Tactics

Because of attack speed at 1.0 second per shot, Air Defense has damage per shot equal to damage per second. At level 6, it deals 230 damage per shot which takes 10 shots to take down Dragon level 3.

What is Air Defense upgrade priority? And to what level?
Because air units are not prevalent, you can focus on Splash defense then Cannon or Archer Tower before upgrade your Air Defense.
Clash of Clans Tactics

It’s hard to say what level of Air Defense you need because only time you want to upgrade Air Defense is right after you see your base was mowed down by those air army. Try to upgrade them to at least level 3 which not take much time of your builders.

Defense Tactics for Air Defense
1) Good coverage
Ideally, placing 2 Air Defenses in the opposite of side of the base, while 3 Air Defenses should create virtual triangle shape. This placement will cover the entire airspace of your base.

2) Center focus for trophy protection
To fight against heavy Dragon Army, putting all Air Defenses around your Town Hall at the center of your base is the only way to prevent from losing 3 stars. Be careful not to place them next to each other to avoid 3 Lightning Spells to destroy both Air Defenses at once.

Attack Tactics against Air Defense
1) Anything!
Just attack Air Defense with ground units, pure and simple. If your army combination contains only ground units, Air Defenses become only a meat shield for you to destroy.

2) Swarm!
While it’s not cost effective, without splash damage, you can swarm Air Defense with lots of Minions.

May Updates Town Hall 10 Analysis

Tactical Analysis
May Updates: New Town Hall level 10

Is it worth to go to Town Hall 10 now?
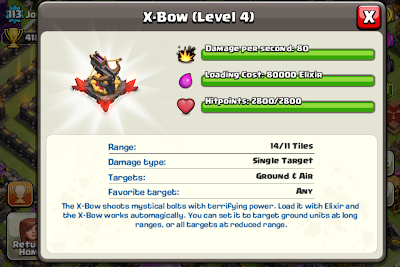
Top player have to upgrade to Town Hall 10 because they are at max Town Hall 9. Small improvement of Dragon level 4 and Golem level 5, along with Inferno Tower, X-Bow level 4 and additional Canon & Archer Tower, will definitely help on both attack and defense in trophy race.
Clash of Clans Tactics

How about normal player or typical farmer? 
Don’t rush yourself because the loot penalty will affect your resource earning rate. At Town Hall 10, easy Town Hall 8 comes with 50% loot penalty. It will be hard to find good resources from Town Hall 9, and most of the time you have to fight against dual X-Bow.

Don’t get fooled by new awesome Inferno Tower as same as lots of premature Town Hall 9 get lured by Archer Queen and X-Bow.

So Town Hall 10 only gives access to only Dragon level 4 and Golem level 5? 
Yes, it is…….for now. In the next few months, there will be lot of goodies for Town Hall 10.

Need proof? We have no proof but strong evidence.
2 months after Town Hall 9 released, Supercell offer Heroes including Archer Queen, additional and new upgrade of X-Bow to Town Hall 9. A month later, Town Hall 9 has useful troops level 6 to enhance their attack army.

Attack log and replays?
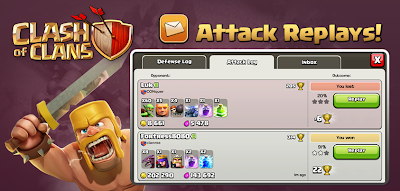
Last 10 attack logs will be stored for your record. You can now easily track how much resources and trophy you gain from the last 10 attack.

Last 4 attack replays will be viewable for your pleasure. Actually, this is the best way to learn your mistakes of troop deployment and also able to share your great tactics among your friends.

The center of your village is now marked with a plaque.
One of the most important tips in Advanced Defense Tactics is determine what should be at the center of your base. This mark is where your Clan Castle or other precious buildings will stay.
Clash of Clans

Decreased Healer’s housing space requirement, training time and training cost
Pre-update Healer has 20 housing space, 20 minutes training time.
Post-update Healer has 14 housing space, 15 minutes training time.

Recent addition of Air Defense seems to counter Healer tactic, however, reduced Healer’s housing space is a huge improvement and has been requested for many months to make Healer becomes playable.

We have tried a lot of combination with some Wizards & Archers. Using 4-8 Healers in conjunction with 12-16 Giants or Barbarian King Level 10 seems to be good tactics against base with low to decent Air Defense placement. A lot of practices are still needed to make sure that your Healers won’t wander around and heal lowly Archer instead of Giant group.

While training time is not viable for typical farmer, with not much Elixir cost (compared to all Dragon army), it is decent combination to train in between 30 – 45 minutes break or overnight.

Defense setup against Healer;
Make sure you put at least 1 – 2 Air Defense near center of your base. Don’t be overconfident and leave all Air Defense outside of your base. May the Healer be on your side.

Decreased Heroes’ upgrade times, regeneration times and upgrade costs on some levels
  • No more ridiculous Heroes’ Upgrade times. Post-update, maximum upgrade time is capped at 7 days which is far better than pre-update 14 days.
  • Regeneration times are reduced. With only 4 minutes incremental change on each Heroes level and maximum cap at 3 hours, they are really worth for your Dark Elixir. Upgrade your Heroes whenever possible is always our recommendation!
  • Upgrade costs are reduced, especially Archer Queen from level 1 to 10. Because you normally avoid Archer Queen to get hurt and use her as sniper support, it is extremely good tactics to upgrade her for more damage output and don’t worry about her increased sleeping time.
Decreased cost of Dark Elixir Drill upgrade
While this seems irrelevant to the Attack and Defense Tactics, lower upgrade cost means more incentive for players to upgrade their Dark Elixir Drill which means more Dark Elixir circulate in the game. With more available loot, Dark Elixir troops will becomes easier to use. This is likely to be the way Supercell wants the players to try and use Dark Elixir troops.

Start learning how to use Minions and others; they will eventually become part of your army.

May Updates: New Town Hall level 10


Clash of Clans: May Updates V4.14 Town Hall level 10

Introducing Town Hall level 10 – The Fiery Fortress!!!!

Clash of Clans May Updates
Come read Tactical Analysis on how May Update affect the game play.
  • Unlock powerful new upgrades with Town Hall level 10
  • Additional Cannon, Archer Tower, Giant Bomb and Dark Elixir Drill
  • New heroic levels for Barbarian King and Archer Queen
  • New upgrade levels of X-Bow and Air Defense
Brand new defensive building: Inferno Tower!
  • The Inferno Tower shoots a jet of flame that burns through even the thickest armor.
  • The flame takes a while to heat up, making it most effective against the biggest and baddest troops.
  • Stop Heroes, P.E.K.K.A and Golems in their tracks, and shoot Dragons out of the sky!
  • Be careful: the Inferno Tower can be overwhelmed by a swarm of smaller targets.


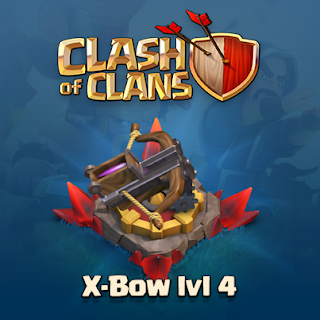
X-Bow level 4
Chief, can it be?! A level 4 X-Bow!!! This defensive turret shoots bolts of Elixir at an incredible rate of fire and now its projectiles are even more lethal!!
Clash of Clans May Update
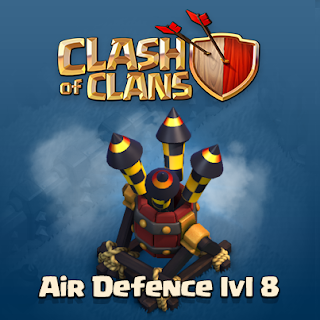
Air Defense level 8
Chief, you can now ramp up your defenses with a level 8 Air Defense!!!
Clash of Clans May Updates

Attack log and replays!
  • Watch replays of your attacks 
  • See a log of your attack history with a record of loot and trophies captured
  • Show your most dominant victories to friends and family
  • Analyze your toughest fights and improve your skills
Clash of Clan May Updates

Level 8 Laboratory: better, faster and stronger than ever!
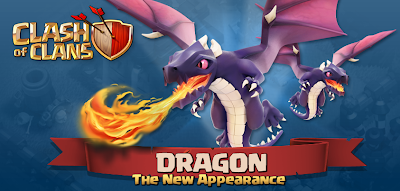
  • Unleash the ancient Red Dragon (Dragon level 4)
Clash of Clans May Updates
As expected, New Dragon is coming!!! Make sure you have proper upgraded Air Defense.
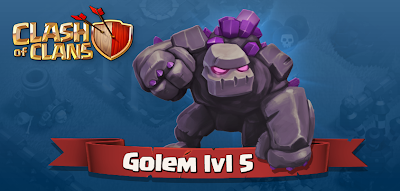
  • Rock on with Golem level 5
Clash of Clans May Updates
This is absolutely ROCK and very hard to kill!!!
  • Support the troops with Healer level 4

Interface improvements
  • Chinese language setting is now available
  • Hugely expanded keyboard support. Write in any language!
  • Smileys and other emoji characters supported in chat! Add the special Emoji keyboard in your device settings (General > Keyboard > Add new Keyboard).
  • Quickly browse through Barracks, Dark Barracks and Spell Factory screens by tapping arrows
  • Number of clan troops received is now shown in addition to the number of troops donated
  • The center of your village is now marked with a plaque
  • Personal breaks enforced for players who stay continuously in-game for very long periods of time
Clash of Clan May Updates

Balance tweaks
  • Decreased Healer’s housing space requirement, training time and training cost
  • Decreased Heroes’ upgrade times, regeneration times and upgrade costs on some levels
  • Decreased training cost of Golem on level 2, 3 and 4
  • Decreased cost of Town Hall level 9 upgrade
  • Decreased cost of Laboratory upgrade to level 5, 6 and 7
  • Decreased cost X-Bow upgrade to level 2 and 3
  • Decreased cost of Air Defense upgrade to level 7
  • Decreased cost of Dark Elixir Drill upgrade

Inferno Tower

What is Inferno Tower?
Inferno Tower is new awesome defense building coming with Town Hall 10 in May 2013 updates. Due to its progressive damage, it will be important defense building for high hit point troop like P.E.K.K.A or Golem. Actually, it seems to be the only tower that can effectively fight against the mighty Golem in high trophy range where Golem is prominent now.
Clash of Clans Tactics
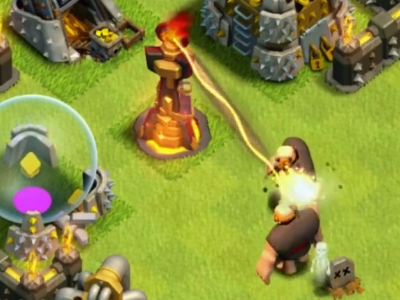
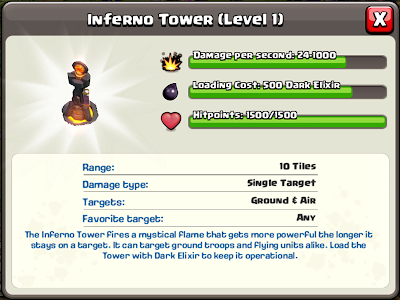
The Inferno Tower fires a mystical flame that gets more powerful the longer it stays on a target.
It can target ground troops and flying units alike.
Load the Tower with Dark Elixir to keep it operational.
Here’s a video from Supercell showing off Inferno Tower in action;


Looking for more firepower?
Introducing the Inferno Tower
Inferno Tower does more damage the longer it attacks a single target! (Progressive Damage)
Powered by Dark Elixir for extra stopping power!
Perfect for defending against the mighty level 4 Dragon
Light it up with Town Hall 10
Heat up your game

Inferno Tower Fact (at level 1)
Clash of Clans Tactics

Damage per second = 24 - 1,000
Loading Cost = 500 Dark Elixir
Hit points = 1500
Range = 10 tiles
Damage type = Single Target (Progressive Damage)
Targets = Ground & Air
Favorite Target = Any

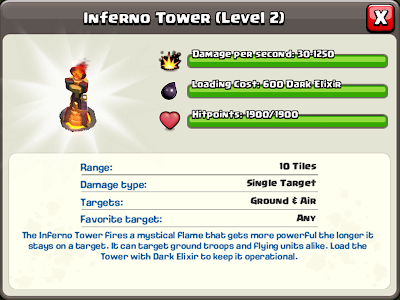
Inferno Tower Fact (at level 2)
Clash of Clans Tactics

Damage per second = 30 - 1,250
Loading Cost = 600 Dark Elixir
Hit points = 1900

Inferno Tower – time to kill - Golem

Defense Tactics for Inferno Tower
1) Golem Killer!
Put Inferno Tower behind 2nd layer of wall. Let X-Bow and Splash tower kill off those small troops, then Inferno Tower will take care Golem, P.E.K.K.A and Heroes.

Attack Tactics against Inferno Tower
1) Swarm!
Just swarm Inferno Tower with Barbarians or Archers.

Hidden Tesla

What is Hidden Tesla?
Hidden Tesla is tricky defense building coming with 30 August 2012 updates. It is the only building in the game that stays hidden until attacking enemy come close (besides traps).
Clash of Clans Tactics
Lay a deadly trap with the Hidden Tesla! Our Wizards have trapped a storm cloud into each of these sneaky towers. When an enemy walks or files close enough, the tower springs up and fries it using the power of Electrickery!
Here’s a preview video showing off Hidden Tesla;


What’s that ZAPPING sound? Oh yeah, it’s coming from the Hidden Tesla while zappin’ those poor attackers!

Hidden Tesla Fact (at level 1)
Damage per second = 34
Hit points = 600
Range = 7 tiles (Trigger range = 6 tiles or 50% total base damage)
Damage type = Single Target
Targets = Ground & Air
Favorite Target = P.E.K.K.A (Damage x 2)
Clash of Clans Tactics

Hidden Tesla shoots at very fast rate of 0.6 second per shot, combining with Hidden special ability make Hidden Tesla one of the best defenses to kill off Wall Breaker.

Hidden Tesla - one hit kill – Wall Breaker
Hidden Tesla level 1 deals 20 damage per shot, thus one hit kill Wall Breaker level 1.
Hidden Tesla level 2 deals 24 damage per shot, thus one hit kill Wall Breaker level 2.
Hidden Tesla level 3 deals 29 damage per shot, thus one hit kill Wall Breaker level 3.
Hidden Tesla level 5 deals 38 damage per shot, thus one hit kill Wall Breaker level 4.
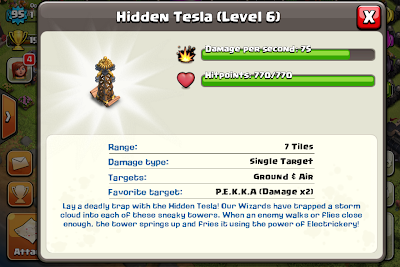
Hidden Tesla level 6 deals 45 damage per shot, thus one hit kill Wall Breaker level 5.

Defense Tactics for Hidden Tesla
1) Basic Placement
Just place your Hidden Tesla behind 1st layer of wall either in its own 2x2 spaces or mix with other defense buildings. This is good position to kill incoming Wall Breaker without decoy. Note that it is easy to guess if there are empty 2x2 spaces surrounded with Walls.

You can choose to leave lots of 2x2 spaces empty to confuse attacker where Hidden Tesla really is.

2) Surprise & Giant lure
Placing Hidden Tesla outside your wall or in open space makes your Hidden Tesla defenseless. However, it is almost impossible for attacker to predict where Hidden Tesla is. The surprise factor can help your base to win on defense against careless attacker.

When Hidden Tesla pop up, it will lure enemy Giants to walk and attack it first, thus diverting Giant from intended path. This tactics can be used in conjunction with funneling tactics i.e. predetermine the walking path of enemy Giants then placing Spring Trap in front of Hidden Tesla.

3) Center focus
Place all Hidden Tesla deep in the middle of your base, surrounding and protecting either Town Hall or Storages. 3 or 4 Hidden Tesla firing at the same target such as Dragon, can quickly take down almost any unit in split second.

Attack Tactics against Hidden Tesla
1) Swarm!
Just swarm Hidden Tesla with Barbarians or Archers.

Archer Tower


What is Archer Tower?
Archer Tower is your second defense building available. And it is your first accessible defense building against air troop in the game. It is very similar to Cannon in term of single target attack. While Archer Tower shoots a little bit slower than Cannon, Archer Tower has range a little bit more and can attack air troop, this is why Archer Tower is more expensive and takes longer to upgrade compared to Cannon.
Clash of Clans Tactics
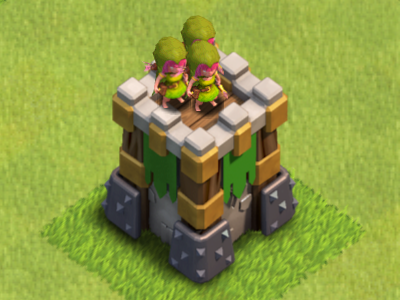
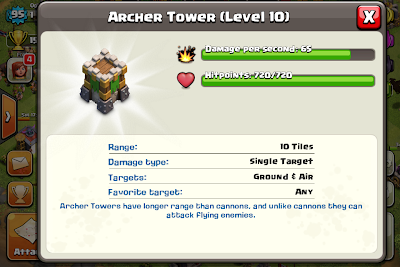
Archer Towers have longer range than Cannons, and unlike Cannons they can attack flying enemies.
What to upgrade first, Archer Tower or Cannon?
While Cannon is cheaper and quicker to upgrade, it is a good tactics to upgrade Archer Tower first because of its overall defense capabilities.

Archer Tower Fact (at level 1)
Damage per second = 11
Hit points = 400
Range = 10 Tiles
Damage type = Single Target
Targets = Ground & Air
Favorite Target = Any

Because of Archer Tower single target nature, it is great when shooting at high hit point troop such as Giant. It is bad when is being attacked by hordes of Barbarians and Archers.

Archer Tower shoots at normal rate of 1.0 second per shot. It is a good tactics against Wall Breaker to upgrade you Archer Tower to at least level 7. Coincidentally, Archer Tower level 7 also one hit kill Archer level 5.

Archer Tower - one hit kill – Wall Breaker
Archer Tower level 4 deals 25 damage per shot, thus one hit kill Wall Breaker level 1 and 2.
Archer Tower level 5 deals 30 damage per shot, thus one hit kill Wall Breaker level 3.
Archer Tower level 6 deals 35 damage per shot, thus one hit kill Wall Breaker level 4.
Archer Tower level 7 deals 42 damage per shot, thus one hit kill Wall Breaker level 5.

Archer Tower- one hit kill - Archer
Archer Tower level 7 deals 42 damage per shot, thus one hit kill Archer level 5.
Archer Tower level 8 deals 48 damage per shot, thus one hit kill Archer level 6.

Clash of Clans Tactics

Defense Tactics for Archer Tower
To create good coverage of the entire base, 5 Archer Tower placements should create virtual pentagon shape.  6 Archer Tower placements should create virtual hexagon shape or double triangle shape.

1) Perimeter protection
Place your Archer Tower behind 1st layer of wall. This is good position to kill incoming Wall Breaker without decoy.

2) Focus fire
Place your Archer Tower behind 2nd layer of wall or near middle of the base. This tactics use splash damage to deal with hordes of Barbarians and Archers while Archer Tower focus fire on bigger troop like Giants, Dragons or P.E.K.K.A.

3) Cover its weakness
Archer Tower shoots at single target. It is basically a good tactics to mix in Mortar and Wizard Tower to balance out defense capabilities.

Attack Tactics against Archer Tower
1) Swarm!
Just swarm Archer Tower with Barbarians or Archers. Ten Archers level 5 can take down one Archer Tower level 10 in 4 seconds!

Rage Spell


What is Spell?
From the Spell Factory, you can create powerful spells that can be used when attacking enemy villages. Spells requires Elixir to create.

Do we need to use spell in the battle?
You don’t have to use spell in the battle. But at the expense of some Elixir, you can use these powerful Attack Spells to turn the tide of battle in your favor! Practice and you shall master!

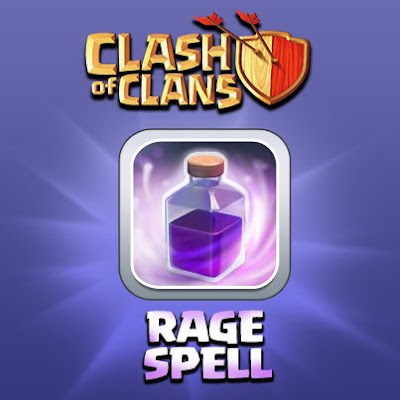
When you upgrade Spell Factory to level 3, you gain access to the third spell of the game: Rage Spell. Similar to Healing Spell, Rage Spell is used to support your troops. Instead of healing your troops to prolong the battle, Rage Spell will enhance your troops attack capabilities and try to end the battle as soon as possible.
Clash of Clans Tactics
Enrage your units to make them bigger, faster and stronger! Cast this to create a Ring of Rage! Your units will gain speed and attack power while they are inside this ring.
Rage Spell Fact (at level 1)
Damage increase = 130%
Speed increase = 20
Cost = 30,000 Elixir
Effect type = Area Splash
Time to create = 45 minutes
Targets = Ground & Air

When casted, a Ring of Rage is created and last about 18 seconds. Each upgraded Rage spell makes the spell better by giving out more Damage and Speed increase to the troops. While it seems obvious that Rage Spell is effective for slow troop and troop with high damage output such as P.E.K.K.A, Rage Spell is also good for fast troop and small troop.

Attack Tactics for Rage Spell
1) Fight invincible base
Normally, even if you go all out, you cannot put up a fight against max upgrade base and can hardly one star them, this is when Rage Spell comes into play. Cast 1-2 Rage Spell consecutively when your troops is trying to advance into the base. The damage and speed increase help your troops take down key defense such as X-Bow and can penetrate the Walls quicker.

This tactics can also be used with army of 10-11 Dragons to mow down the base and take down key Air Defense before your dragons are shot down.

2) Raging Goblins!
It seems counter-intuitive to spend 44,000 Elixir to cast one Rage Spell level 5 on Goblins just to destroy the Storages. However, there are situations when this is profitable to do.
- Your target is Dark Elixir Storage. Because Dark Elixir is hard to obtain so spending 44,000 Elixir in exchange for 2,000+ DE is very well worth it.
- Without Rage, Goblins will quickly die by Mortar and Wizard Tower splash shot before stealing any Resources. Casting Rage Spell will enhance your Goblins to run quicker and destroy Storages within few seconds!

Don’t underestimate the difference in second, here are the examples;
Dark Elixir Storage level 4 has 2,200 hit points.
Ten Goblin level 5 can deal 640 damages per second, thus need 3.44 seconds to destroy.
Ten Raging Goblin level 5 can deal 1150 damages per second, thus need 1.91 seconds to destroy.

Five Goblin level 5 can deal 320 damages per second, thus need 6.88 seconds to destroy.
Five Raging Goblin level 5 can deal 575 damages per second, thus need 3.83 seconds to destroy.

Defense Tactics for Rage Spell
1) Base Segmentation
There is not much tactics you can do to defend against well-placed Rage Spell. Using Walls to create segments as much as possible will delay the troops.

Cannon


What is Cannon?
Cannon is your first accessible defense building in the game (since tutorial). It is cheap and fast to build and upgrade. It’s not the most important defense building of the game, but it acts like a backbone of your village since the beginning until the high-end level village.
Clash of Clans Tacitcs
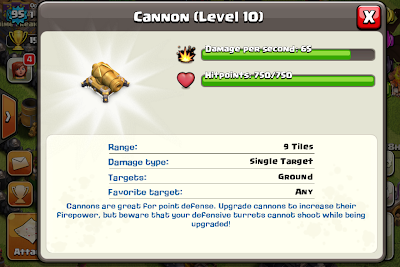
Cannons are great for point defense. Upgrade Cannons to increase their firepower, but beware that your defensive turrets cannot shoot while being upgraded!
Cannon Fact (at level 1)
Damage per second = 9
Hit points = 400
Range = 9 Tiles
Damage type = Single Target
Targets = Ground
Favorite Target = Any

Because of Cannon single target nature, it is great when shooting at high hit point troop such as Giant. It is bad when is being attacked by hordes of Barbarians and Archers.

Cannon shoots at fast rate of 0.8 second per shot, makes Cannon one of the best defense to kill off Wall Breaker before blowing off your wall. It is a good tactics against Wall Breaker to upgrade you Cannon to level 9. Coincidentally, Cannon level 9 also one hit kill Archer level 5 and 6.

Cannon - one hit kill – Wall Breaker
Cannon level 5 deals 20 damage per shot, thus one hit kill Wall Breaker level 1.
Cannon level 6 deals 25 damage per shot, thus one hit kill Wall Breaker level 2.
Cannon level 7 deals 32 damage per shot, thus one hit kill Wall Breaker level 3.
Cannon level 8 deals 38 damage per shot, thus one hit kill Wall Breaker level 4.
Cannon level 9 deals 45 damage per shot, thus one hit kill Wall Breaker level 5.

Cannon- one hit kill - Archer
Cannon level 9 deals 45 damage per shot, thus one hit kill Archer level 5 and 6.
Clash of Clans Tactics
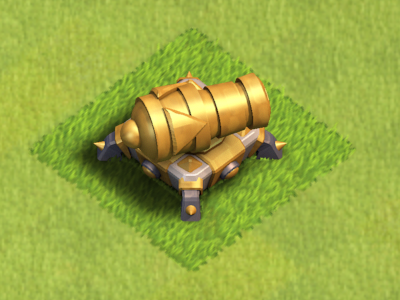
Cannon level 10 is all golden, intimidate opposing enemy!
Defense Tactics for Cannon
To create good coverage of the entire base, 5 Cannon placement should create virtual pentagon shape, or create square shape using 4 Cannons and place 1 Cannon in unique location.

1) Perimeter protection
Place your Cannon behind 1st layer of wall. This is good position to kill incoming Wall Breaker without decoy.

2) Giant lure
Placing Cannon outside your wall will lure enemy Giants to walk and attack Cannons first, thus diverting Giant from intended path straight to the core. This tactics can be used in conjunction with funneling tactics i.e. predetermine the walking path of enemy Giants then placing Spring Trap on the path.

Compared with other defense, Cannon is somewhat dispensable; this tactics makes Cannon a damage absorber/buffer to enemy troops, while having other Defense buildings to deal damage.

3) Cover its weakness
Cannon shoots at single target and cannot shoot at air target. It is basically a good tactics to mix in Archer Tower, Mortar and Wizard Tower into the mix to balance out defense capabilities.

Attack Tactics against Cannon
1) Air attack
Without air defense around, Minion can easily pick off Cannon.

2) Swarm!
Just swarm Cannons with Barbarians or Archers. Ten Archers level 5 can take down one Cannon level 10 in 4 seconds!

Wizard Tower


What is Wizard Tower?
Wizard Tower is your second accessible splash defense building other than Mortar. It is another important defense building in the mid-stage of the game to help defending your village against lots of Barbarians, Archers and Goblins. Prioritize your Wizard Tower along with Mortar as suggested in Advanced Defense Tactics.
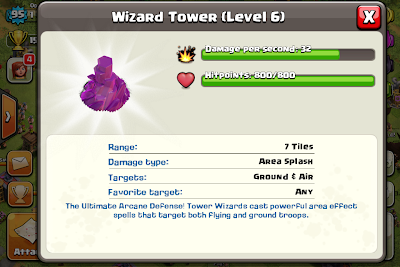
Clash of Clans Tactics
The Ultimate Arcane Defense!
Tower Wizards cast powerful area effect spells that target both flying and ground troops.
Wizard Tower Fact (at level 1)
Damage per second = 11
Hit points = 620
Range = 7 tiles
Damage type = Area Splash
Targets = Ground & Air
Favorite Target = Any

Similar to Mortar, don’t be fooled by its low damage per second. Because Wizard Tower takes 1.3 seconds between each shot, the damage per shot is equal to 1.3 times the damage per second. Upgrade Wizard Tower as fast as you can to one hit kill Archer and Goblin.

Should I focus on upgrading Wizard Tower or Mortar first?
Mortar is cheaper and quicker to upgrade, has long range and larger splash radius which is important in early to mid-stage of the game.
Wizard Tower is more expensive and short range. However, due to higher damage per second and ability to hit both Ground and Air target, Wizard Tower is much more reliable defense and contributes lots more damage in general.

Wizard Tower - one hit kill - Archer
Wizard Tower level 3 deals 21 damage per shot, thus one hit kill Archer level 1.
Wizard Tower level 4 deals 26 damage per shot, thus one hit kill Archer level 2.
Wizard Tower level 5 deals 31 damage per shot, thus one hit kill Archer level 3.
Wizard Tower level 6 deals 42 damage per shot, thus one hit kill Archer level 4 and 5.
Wizard Tower level 7 deals 52 damage per shot, thus one hit kill Archer level 6.

Wizard Tower - one hit kill - Goblin
Wizard Tower level 4 deals 26 damage per shot, thus one hit kill Goblin level 1.
Wizard Tower level 5 deals 31 damage per shot, thus one hit kill Goblin level 2.
Wizard Tower level 6 deals 42 damage per shot, thus one hit kill Goblin level 3.
Wizard Tower level 7 deals 52 damage per shot, thus one hit kill Goblin level 4 and 5.
Clash of Clans Tactics
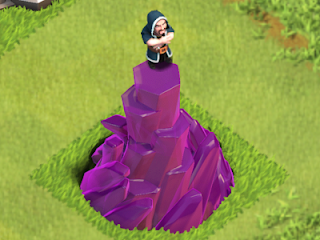
Wizard Tower level 6 has purple swirl around the base, so intimidating!
Defense Tactics for Wizard Tower
To create good coverage of the entire base, 3 Wizard Towers placement should create virtual triangle shape. 4 Wizard Towers placement should create square or diamond shape.

1) Protect inner core
Place your Wizard Tower behind wall in the second layer. This is good position to shoot at troops passing your 1st layer of wall and attacking buildings or 2nd layer of wall.

This is also a good tactics if your Storages are in the inner core. Wizard Towers can protect those Storages from hordes of Goblin.

2) Protect perimeter of the base
Place your Wizard Tower behind 1st layer of wall. To utilize its short range, this placement ensures that Wizard Towers will get in action once enemy troops are approaching base perimeter.

This tactics is good against enemy with only Barbarians and Archers, but it becomes bad tactics if there are Giants decoy.

3) Wizard Tower & Mortar Combination
Placing both splash damage next to each other can make perfect splash damage coverage. They also complement each other by combining short and long range. Remember that this tactics is susceptible to multiple Lightning Spells.

Attack Tactics against Wizard Tower
1) Use decoy to lure/distract
Use one Giant to lure Wizard Tower, as long as that Giant is still alive, Wizard Tower will keep shooting at it. Then deploy bunch of Archers to quickly destroy Wizard Tower.

2) Spread out troops
Avoid deploying lot of Barbarians and Archers in the same spot; try to spread them out to lessen the splash damage.

3) Send out Goblins in several batches
Let’s say you carry 40 Goblins and want to attack Storages with Wizard Tower standing by. Instead of deploy all Goblins at once and becomes a victim to Wizard Tower powerful splash shot, separately deploy only 8-10 Goblins at a time. 4-5 waves of Goblins will increase the chance to loot more resources from the Storages.
May Updates Sneak Peeks


The New Update is HOT HOT HOT
Clashers! We're gearing up for a HOT, new update. Get ready for some sneak peeks that will make you sweat!

Attack Replays
Coming soon: Attack log and replays!! Soon you can watch replays of your attacks and show your most dominant victories to friends and family!!! Get ready to analyze your toughest fights and improve your skills!
Clash of Clans May Updates

Troops Requested/Donated
Chief, are your clan’s troop donations soaring through the roof?! Soon you can also see how many troops your clan members have received!!
Clash of Clan May Updates

Clashers! Sneak Peeks is not as exciting as New Town Hall level 10, you better check below links.

Healing Spell


What is Spell?
From the Spell Factory, you can create powerful spells that can be used when attacking enemy villages. Spells requires Elixir to create.

Do we need to use spell in the battle?
You don’t have to use spell in the battle. But at the expense of some Elixir, you can use these powerful Attack Spells to turn the tide of battle in your favor! Practice and you shall master!

When you upgrade Spell Factory to level 2, you gain access to the second spell of the game: Healing Spell. While Lightning Spell is used to deal direct damage, Healing Spells is used to support your troops, making them live and fight longer than usual.
Clash of Clans Tactics
Heal your troops to keep them in the fight! Cast this spell to create a Ring of Healing.
Your units will be healed while they are inside this ring.
Healing Spell Fact (at level 1)
Total Healing = 400
Cost = 20,000 Elixir
Heal type = Area Splash
Time to create = 30 minutes
Targets = Ground & Air

The total healing doesn't occur immediately. The healing pulse heals small number of hit points over 12 seconds. Each upgraded Healing spell makes each healing pulses stronger. This is the reason why Healing Spell is better used to support in attrition war to heal troops with high amount of hit points.

Attack Tactics for Healing Spell
1) Heal your Tanker/Meat Shield/Damage Absorber
Use Healing spell to support Giant Army. Cast the spell when Giants are in the middle of the fight, making Giants survive heavy attack while Archers doing their job. It also works well because Giant is slow and will utilize all duration of Healing Spell.

Dragon is another possible target for Healing Spell. Due to high amount of hit points, Dragon can survive long grinding battle with Archer Towers. Use Healing Spell when Dragons reach middle of the base, making sure they survive long enough to destroy Town Hall or Storages.

2) Heal your Wizard Army
Wizard is a unique troop that can deal large amount of damage but has very low hit points. This seems counter-intuitive to use Healing Spells on them, but making Wizard live longer for just few more seconds allow them to shoot one more time is enough to guarantee lots of more damage.

Defense Tactics for Healing Spell
1) Focus Fire
Try to group your defense tower as close as possible especially single damage towers like Cannon, Archer Tower. Doing so will make your defense towers focus fire on one unit at a time, killing them before moving on to next target.

Mortar


What is Mortar?
Mortar is your first accessible splash defense building. It is the most important defense building in the early to mid-stage of the game to help defending your village against lots of Barbarians and Archers. Prioritize your Mortar as suggested in Advanced Defense Tactics.
Defense Tactics
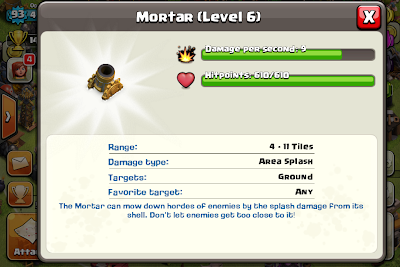
The Mortar can mow down hordes of enemies by the splash damage from its shell.
Don’t let enemies get too close to it!
Mortar Fact (at level 1)
Damage per second = 4
Hit points = 400
Range = 4 – 11
Damage type = Area Splash
Targets = Ground
Favorite Target = Any

Don’t be fooled by its extremely low damage per second. Because it takes 5 second between each shot, the damage per shot is equal to 5 times the damage per second. Since Archer is usually the main troop, upgrade Mortar as fast as you can to one hit kill Archer.
Clash of Clans Tactics
9 Damage per second is equal to 45 Damage per shot, simply one hit kill Archer level 6!
Mortar - one hit kill - Archer
Mortar level 1 deals 20 damage per shot, thus one hit kill Archer level 1.
Mortar level 2 deals 25 damage per shot, thus one hit kill Archer level 2.
Mortar level 3 deals 30 damage per shot, thus one hit kill Archer level 3.
Mortar level 4 deals 35 damage per shot, thus one hit kill Archer level 4.
Mortar level 5 deals 40 damage per shot, thus one hit kill Archer level 5.
Mortar level 6 deals 45 damage per shot, thus one hit kill Archer level 6.

Defense Tactics for Mortar
1) Mortar coverage entire base
Symmetrically place your Mortar behind wall, preferably in the second layer. This is good position to shoot at troops hitting your 1st layer of wall while lessen the chance of enemy troop to reach Mortar’s blind spot. 2 Mortars should be placed in the opposite of side of the base, while 3 Mortars should create virtual triangle shape.

Attack Tactics against Mortar
1) Use decoy to lure Mortar shot
Use one Giant to lure Mortar shot, as long as that Giant is still alive, Mortar will keep shooting at it. Then deploy bunch of Archers to quickly destroy the Mortar.

2) Spread out troops
Avoid deploying lot of Barbarians and Archers in the same spot; try to spread them out to lessen the splash damage.

3) Rush to close range/blind spot
If Mortar is too exposed and easy to reach, just deploy Barbarians because Mortar cannot shoot at them.

Lightning Spell


What is Spell?
From the Spell Factory, you can create powerful spells that can be used when attacking enemy villages. Spells requires Elixir to create.

Do we need to use spell in the battle?
You don’t have to use spell in the battle. But at the expense of some Elixir, you can use these powerful Attack Spells to turn the tide of battle in your favor! Practice and you shall master!

So what is the first Spell we can try?
When you finish building Spell Factory, you gain access to the first spell of the game: Lightning Spell.
Clash of Clans Tactics
This bottle of blue liquid is more useful than you might first imagined.
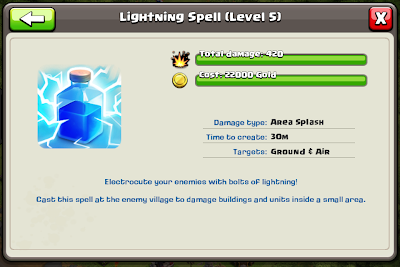
Electrocute your enemies with bolts of lightning!
Cast this spell at the enemy village to damage buildings and units inside a small area.

Lightning Spell Fact (at level 1)
Total Damage = 300
Cost = 15,000 Elixir
Damage type = Area Splash
Time to create = 30 minutes
Targets = Ground & Air
Clash of Clans Tactics
Upgrade to level 5 for more powerful lightning at 420 damage!
Attack Tactics for Lightning Spell
1) Destroy specific defense towers
Most common target to destroy is Mortar and Air Defense. In some layout, destroy key Mortar will neutralize the defense power from one side which let the attacker troops to easily march to the middle of the base. At high trophy level, destroy one Air Defense, and then deploy 10-11 Dragons will successfully win the battle.

2) Clan Castle Troops
25-30 Archers from Clan Castle sometimes can be hard to deal with. Simply lure all of them out, wait them to stand close together and then zap! One lightning strike kills them all. This tactic is commonly used in conjunction with the above Dragon tactics.

3) Directly attack Resource Storage
Favorite target is Dark Elixir Storage. Because Dark Elixir is very hard to gather and Town Hall 7 cannot build Dark Elixir Drill, the value of Dark Elixir is far more outweigh the Gold cost to spend on Lightning Spell.

Defense Tactics against Lightning Spell
1) Separate specific defense towers
Avoid placing same specific defense towers next to each other. While 2 Lightning Spells can destroy one Mortar, placing 2 Mortars together can be simply destroyed by the same 2 Lightning Spells due to area splash damage.

2) Different type of Clan Castle Troops
P.E.K.K.A or Dragon in Clan Castle is good against Lightning Spell. Notes that it will be vulnerable to other kind of attack though.

Barbarian King


What are Heroes?
Heroes can attack enemy villages or guard your village. Heroes can be injured, but are immortal. Heal them by letting them sleep or using the Heal button (using Gems). Heroes won’t defend the village while sleeping.

Who is Barbarian King?
The Barbarian King is the toughest and meanest barbarian in all the realm, whose appetite for Dark Elixir has caused him to grow to a giant size. He attack enemy villages or guard your village.
Heroes Barbarian King
Barbarian with a big sword and shiny armor, He's a King of all Barbarians!
Question: 
Should we bother to build Dark Elixir Storage and Drill to get Barbarian King?
Is it worth it to get Barbarian King from the starting cost of 10,000 Dark Elixir (600 gems)?

Answer: 
Yes, Barbarian King is worth the cost and he is one of the best investments in the game.

Barbarian King Fact (at level 1)
Damage per sec = 150
Hit points = 1,500
Regeneration time = 60 minutes
Favorite target = Any
Damage type = Single Target
Targets = Ground
Movement speed = 16 (equal to normal Barbarian)
Need available builder to buy him from the shop, and need builder to upgrade him.

Barbarian King is a bit slow on attack at the rate of 1.2 seconds. At level 1, he can deal 180 damage per attack (150 * 1.2). While it is high damage against buildings, it is a waste of energy and time to kill Archer one at a time.
Clash of Clans Tactics
It's hard to imagine how strong he is at level 40!
Let’s compare him with P.E.K.K.A. level 1.
Barbarian Kings 1,500 Hit points v.s. P.E.K.K.A. 2,600 Hit points
Barbarian Kings 150 Damage per sec v.s. P.E.K.K.A. 220 Damage per sec

Basically, at level 1, Barbarian King is a mini P.E.K.K.A. They are both ground troop, hit hard on anything on their path, have lots of Hit points, good for both tanking and damage dealer.

The good things about Barbarian King are;
  • He doesn't count into your Army Camp space. He is like extra troop in addition to your current troop’s space.
  • No more resource needed to use him, after initial investment he’s basically free, while you have to pay 35K Elixir and wait 45 minutes of 1 barrack every time to train P.E.K.K.A.
Clash of Clans Tactics
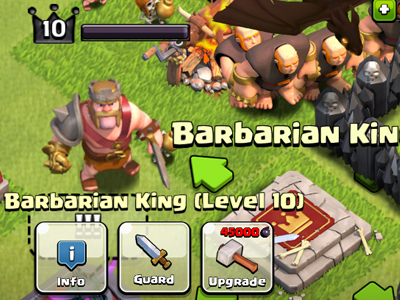
Upgrade Barbarian King to level 10, his gaunlet becomes shiny Gold!
Attack Tactics for Barbarian Kings
1) Damage Dealer/Spare Reinforcement
Because of sleep regeneration time, the most effective use of Barbarian Kings on attack is to deploy him after your main troops. Use other troops to receive damage while your Barbarian King deals lots of damage. Or keep him until the dust settle, then deploy him to pick off leftover buildings. These tactics keep Barbarian King unharmed, so that you can use him in every battle.

2) Tanker/Meat Shield/Damage Absorber/Decoy
Deploy him along with your main troops and make him your war leader! He’s going to die and sacrifice himself for your victory. This is necessary when you have to go all out to defeat those hard and challenging villages. You can also beneficially use this tactics if it’s the last attack of the day.

This tactic is not usually recommended because of you have to wait for quite some time before Barbarian King is back to full health again, especially at higher level, e.g. at level 10 regeneration time is 96 minutes.

Special Tactics
Use Healer in combination of Barbarian King. Barbarian King is harder to die and becomes good tanker, also every time Healer heal Barbarian King, he will spend less time to sleep after end of battle.

Defense Tactics for Barbarian Kings
Unless you can put him deep in the middle of your base, he can be lured out to the corner and only 15 of Barbarians/Archers can knock him down so easily (same as P.E.K.K.A in Clan Castle). Better put him in Sleep mode, so that he’s always ready to use on your attack.
However, if you are away for a long period of time, you can put him on Guard mode for additional defense, by the time you come back to log in, he will be back to full health.

Clash of Clans Tactics

About Clash of Clans Tactics

Who we are?
We are just measly Clash of Clans players among millions of worldwide players.
We just become addicted to one of the great strategy game in the current era of iOS game history.
We play and we play, and then we learn the Tactics from playing and from the community.
It’s time for us to give back to the community as well.

How about you?
Do you have Tactics to play Clash of Clans?
We do have, we always strive for more Tactics, and we are not miserly.
We are willing to share every bit of our knowledge to Clash of Clans fellows, even if you are going to use these awesome Tactics back against us!

We also keep you posted on the New Updates, any change in Game Mechanics, etc.

If you like our website and want to support us, just come back here often to read new Tactics because we just like to share!

Last but not least, Visit and Like us at Facebook!
It is quick and easy way to get notified when new post is published in this website.
http://www.facebook.com/ClashofClansTactics

Aesop's Fables - Master and his pets

Aesop's Fables (Somewhat) - Master, his pets and the borrower


I went to sleep last night and had no idea that was where the story begins....

Someone came to visit my village on 8th street. At first, I don't know what his intention is.
What I only know is that he called down 3 mighty zeus spell straight from the sky, and my precious 493 liters of black oil were missing.

The problem is that I don't know this guy before, and he is the one who find my village first. Moreover, even with my house is nicely open out of the fence, he not even send one of his underling to knock on my door and tell me exactly what he want.

My pets are starting to go frenzy. Without choice, I use magical envelope to trace him back to his village. This is where I find out his intention.

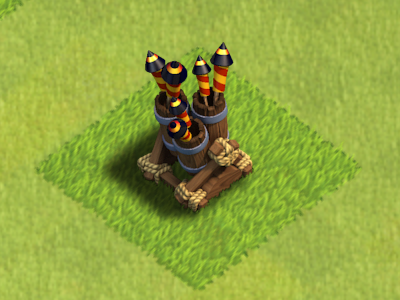
He lives on 9th street. His village is nicely decorated surrounded with pink and purple walls, and there might be a festival coming soon because I see 4 small fireworks are placed around the village.

Looking in the middle of his village, I notice that he's saving lots of black oil, around 35K, and soon he will use that to trade for a lovely girl. I shrug and say to my pets that it's ok if he just want to borrow our oil because he seem to really need the girl more than us, and we will just get it back later.

However, my pets don't agree and I begin to lose control of them. I know I have to call him and ask back for what he borrowed earlier. I quickly send down my men and women to knock on his black house. To no avail, nobody call back. Suddenly 7 of my black wingy pets go wild, fly all over half of his village, rain down pure flame.

While I get back 1,910 liters of black oil along with some coin and juice, I really feel regret to him and want to tell him that my pets just want to do their faithful duty. I come home and the story ends there....

Moral of this story: Make sure you stay home, when someone try to collect the debt from you.

Advanced Attack Tactics

Advanced Attack Tactics
Advanced tactics to strategically analyze target village, effectively deploy troops in sequential fashion and successfully obtain desired Resources.

1) Wisely spend first 30 seconds
First 30 seconds are given to you to decide whether to attack the village. This can be used to spot the strength and weakness of target village. Below are the lists you should do every time you attempt to attack any village.
  • Locate Clan Castle and Heroes Altar location; also plan how to lure them out
  • Find outstanding empty 2x2 spaces as possible location of Hidden Tesla 
  • Locate your target Storages (Don’t forget to check for Abandoned Village in case Resources are actually in the Mines/Collectors)
  • Plan your approach direction, which side to attack and troop deployment. Determine how many Wall Breakers you plan to use, which compartment need to open up.
Once practice enough, you will sequentially do the above steps in mind within 30 seconds.

2) Lure Clan Castle troops and Heroes out of the base
You don’t want to fight with Clan Castle troops and Heroes while defense buildings are shooting on your army. You need to lure them out to the corner or out of defense buildings range and kill them softly using Barbarians and Archers. If Clan Castle is located deep in the middle of the base and cannot be lured out, use 1 Lightning Spell.

Special Tactics: Carry 5 Minions for ground troops and Barbarian King. Once lure them out, 5 Minions can freely kill ground troops. Barbarian King will try to walk back to his Altar, you can deploy 1 Barb or Archer to lure him back and let Minions do the job.

3) Archers to pick off free outside buildings
Determine which buildings are placed out of defense building range; deploy Archers to clear them first. This allows your Barbarians to not get stuck attacking these buildings while getting hit by defense towers.

Normally you can deploy 1 Archer per building which takes around 20-30 sec to destroy, except some buildings with high hit points such as 2 Archers for Army Camp, 3-4 Archers for Clan Castle and 6 Archers for Town Hall.

4) Barbarians as Minesweeper and Spring Trap clearing 
Deploy few Barbarians to clear the path is one of the good tactics, especially against Spring Trap to avoid your Giants demise.

Bomb and Spring Trap are usually placed where the base looks weak, which persuade Attacker to deploy troops there. Sometimes Spring Traps are placed in front of defense tower outside wall; this is normal tactics to easily spring Giants up into the sky.

5) Into the real fight!
Depend on your Army combination which will vary your sequence of Attack.

For normal troop combination, you start with deploying 1-2 Giants as a decoy, and follow up with Wall Breakers to open up the 1st layer of wall. Then, deploy Barbs and Archers for more damage output along with few Giants for more distraction. Deploy Wall Breakers to break through 2nd layer, and more Giants, Barbs, Archers.

Deploy Goblins when the coast is clear for now easy accessible Storages. If there is Wizard Tower protecting the Storages, try to deploy Goblins in 3 – 4 small groups, one group at a time. Notes that you need to clear Gold Mines and Elixir Collector in the perimeter in that area before you deploy Goblins. Otherwise, your Goblins will run wild and target those Mines outside (which is closer) instead of Storages inside.
6) Clean-up phase using spare troops
Depend on your tactics; you may want to deploy all of your army for full force attack. Or you may keep some spare troops in your pocket (preferably Archers, Goblins or Minions) for the clean-up. When you want to win, you don’t want to see all troops die while stopping at 49% damage. Or for the Resources, after the dust settle, few Archers may be able to easily get to the undefended Storage.

Basic Attack Tactics

Basic Attack Tactics
Basic tactics for newbie, starting player who want to know how to properly prepare troops and attack other players.

1) Wait for full Army Camp
Why go on a fight by giving yourself handicap? Take your time and wait until your Army Camps are full. Patience is the virtue of this game!

2) Queue more troops in the Barracks before attacking
Barracks are always training troops for you as long as you queue them, when you start searching for village to attack, even the Army Camps are full. Enjoy your mighty troops when you come back from battle.

3) Mix your troops for effective army
Try not to have army with only one single type of troop. Army of 200 Barbarians or 200 Archers is not as effective as 100 Barbarians and 100 Archers, and so on.

Each troop has its own purpose/specialty. Learn basic mechanic of each troop and utilize them as much as possible. Bring some Giants for distraction/meat shield, some Wall Breakers for…err…breaking the walls. One typical set of 200 space army comprise of 10 Giants, 10 Wall Breakers, 70 Archers, 40 Barbarians, 20 Goblins.

4) Remember what are in your Clan Castle 
Clan Castle troop is additional troops you can deploy besides normal Army space you have. Problem is that if you don’t remember, you won’t know what will come out of Clan Castle.

Sometimes you use Clan Castle as last resort to get 50% Damage or exposed Storage. When you normally expect 20 Archers coming out to seal the deal, you instead release precious Dragon to easily die by Air Defense.

5) Know your Army Strength vs. Target Village
Don’t mess with dual X-Bow when you have only lowly troops, period.

Participate only fight you win, this is easy to say but require a lot of experience to know which village you should attack or avoid. It also depends on your army troop combination. You may encounter weak village with strong Air Defense that your air army cannot effectively attack.

6) Plan what and how much resources you want
Unless you are trophy hunting, ask yourself before go out to attack. Do you want Gold or Elixir or both, or want to prioritize Dark Elixir? For example, it’s ok to get at least 75,000 Gold for weak village, 100,000 Gold for decent village and 150,000 Gold for strong village. This reflects to how many troops you need to use in attack.

7) Don’t miss easy Resources!
Abandoned or Inactive village is the easiest way to gain lots of Resources. Read more details in Abandoned Village post (http://www.clashofclanstactics.com/2013/05/abandoned-or-inactive-village.html)
After finish reading this Basic Attack Tactics, you should know how to prepare your army and make simple attack. Now you should go and learn more by reading Advanced Attack Tactics.